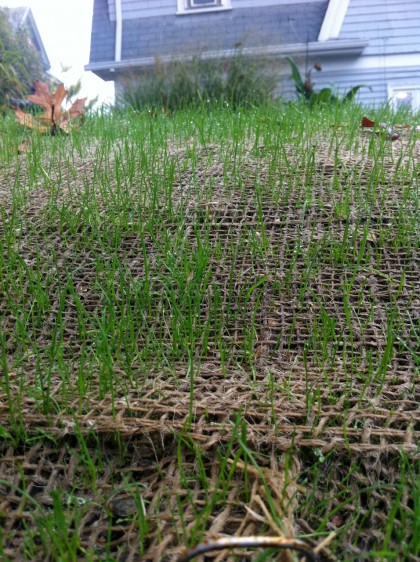
prepping the bathroom floor

November 7th, 2011

David Bettridge will now catch us up on the downstairs bathroom as he preps for tile. Try to contain your excitement, okay?

—————————————————————————-

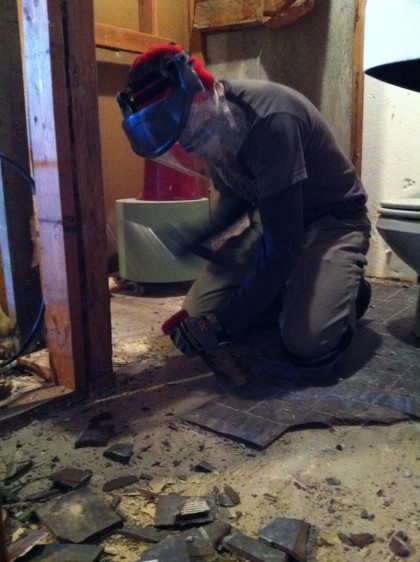
The majority of the downstairs floor is insulated and ready for flooring but the bathroom is its own special case. Way back in March, I removed the old tiles from the floor…

the floor during


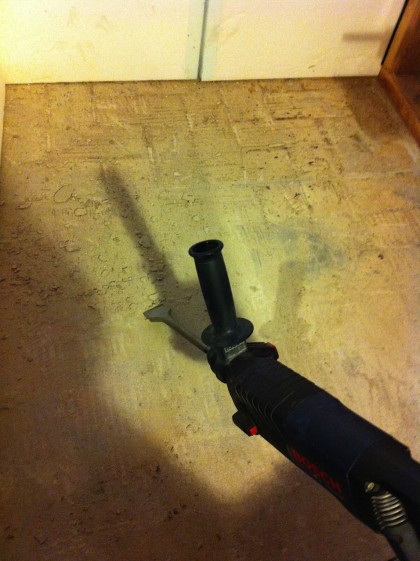
More recently, I removed the last of the thinset (tile ‘glue’, a kind of flexible mortar). A wide chisel bit in my trusty Bosch Bulldog made short work of it…

bathroom floor | bosch bulldog

The Bulldog is a light-duty rotary hammer that has settings for drill+hammer, just drill or just hammer. Hammer drills on the other hand only have settings for just drill or drill + hammer. The Bulldog drills into 40-year old concrete like a hot knife through butter.

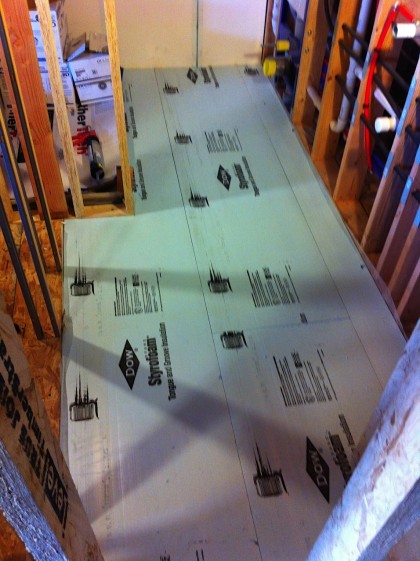
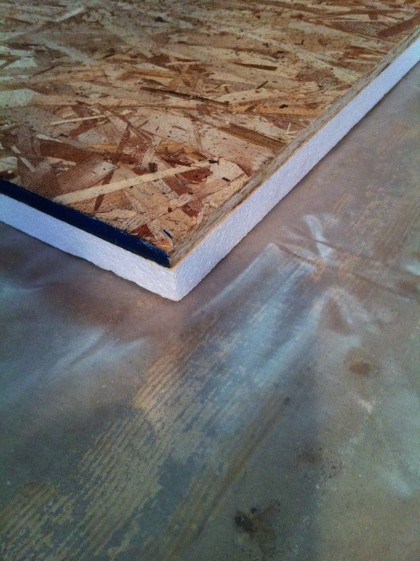
Once the slab was clean and smoothish, I layed down 1” tongue and groove high-density foam insulation…

bathroom floor | foam insulation


It will act as a thermal and moisture break between the new tile floor and the slab (and planet earth) underneath. This will hopefully keep the bathroom floor more comfortable underfoot and keep the basement dry. And it will help the bathroom be more energy efficient as well.

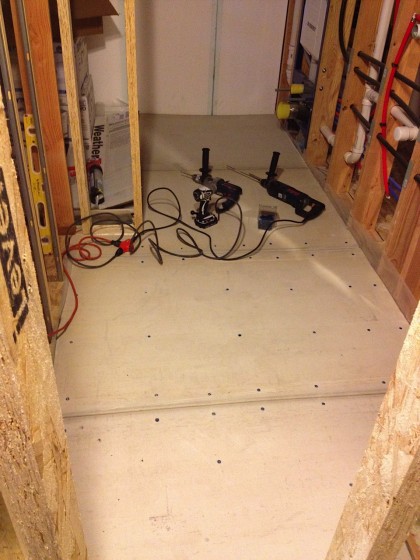
I layed 1/2” cement board over the foam and screwed it down to the slab underneath, using Tapcon screws…

bathroom floor | cement board


Due to their special threads and lubricated coating, they actually cut into the concrete when installed into a pre-drilled hole. Technology, gotta love it. I used a lot of screws so there would be no movement under the floor tile, and therefore no cracking.

Some lucky tile installer will trowel thinset onto the cement board, lay Schluter Ditra tile membrane down before troweling on more thin set, then setting and grouting the floor tiles. The membrane acts as another moisture barrier but more importantly it separates the tile from the floor which lets things move a little bit before any cracking takes place. Again, technology at work.

Schluter will also be providing all the metal bits and pieces that allow tile to be installed up against other materials like cork flooring, wood cabinets, mirror, etc. A small prep detail but an important one. Like they say, do it right the first time.
conspiracy theory

November 3rd, 2011

I’ve noticed something this year. Every time an interior design magazine arrives in the mail, there it is again…

Sunset magazine, pg 53 | October 2011

Sunset magazine, pg 53 | October 2011


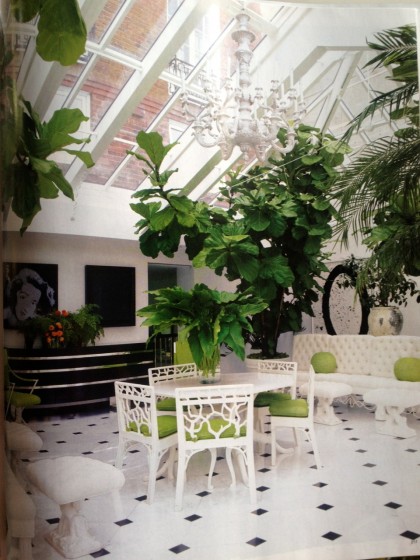
That tree in the corner. It’s a Fiddle Leaf Fig. And it’s everywhere. Usually near the window…

House Beautiful | June 2011

House Beautiful | June 2011


Sometimes there’s not just one but two

Elle Decor | June 2011

Elle Decor | June 2011


Occasionally, they are monstrous…

Elle Decor, pg 217 | September 2011

Elle Decor, pg 217 | September 2011


So my question is, is there some conspiracy going on here? Maybe a botanical PR/lobbyist type at work behind the scenes trying to get this tree more press?

Elle Decor, pg 184 | November 2011

Elle Decor, pg 184 | November 2011


Is this the “It” plant of 2011? Or is every shelter mag’s set stylist just a little heavy handed with this plant?


bamBOO! happy halloween

October 31st, 2011

I apologize for that. And yet I’m not changing it. Oh well. So out front sits a fresh mound of loam — 6 yards of it…

fresh loam


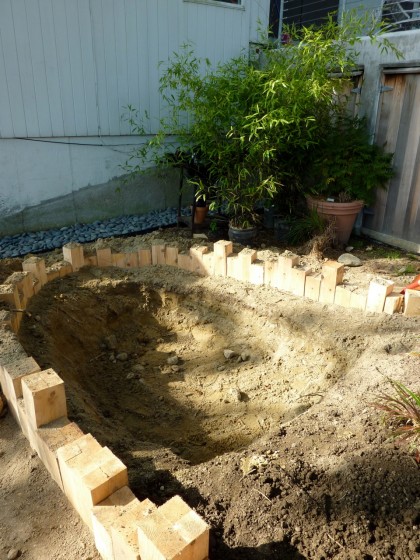
It doesn’t look like much until you start shoveling it. Then you realize it’s never-ending. So why the soil? I finally got around to planting the Phyllostachys nigra ‘Hale’ black bamboo that’s been waiting for its permanent spot. Quite a project. The hole is somewhere between 2 and 3′ deep, so it required a LOT of soil to fill it…

bamboo planting 1


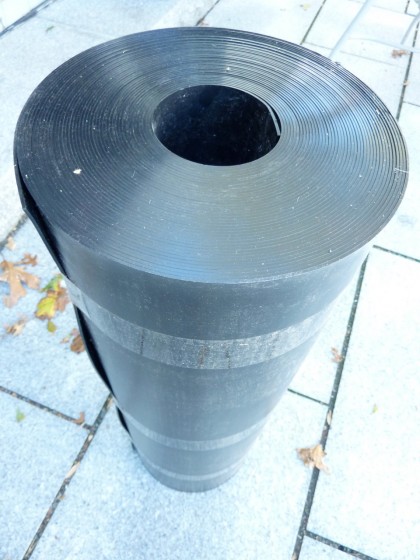
This is the 80 mil bamboo barrier that should (hopefully) keep the roots from escaping…

bamboo planting 2


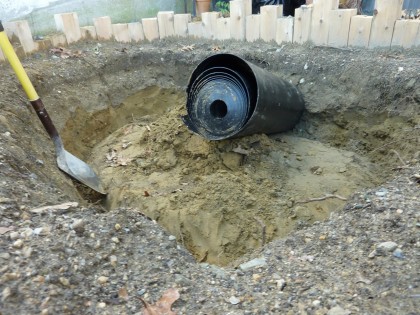
Try dragging that 70 lb thing down the hill and tossing it into the pit. No, really. Go ahead…

bamboo planting 3


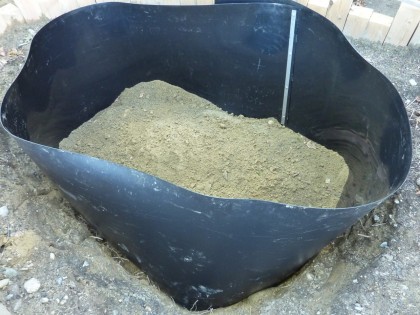
I dug a trench for the barrier a little deeper than the hole. Then David and I ran the sheet around the oval…

bamboo planting 4


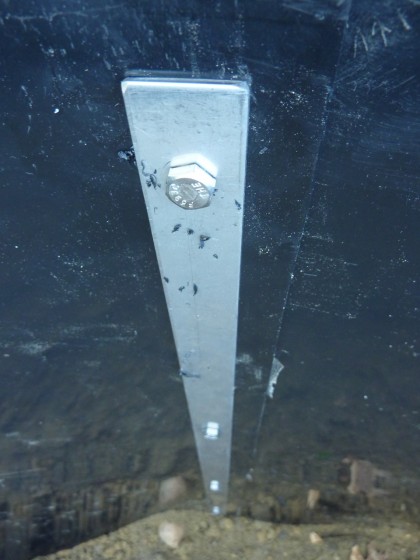
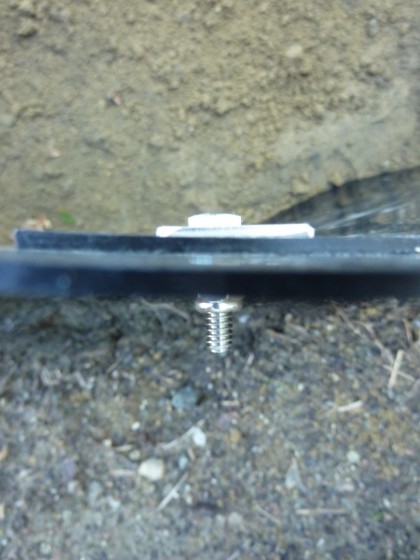
Stainless steel clamps run up both sides of the overlapping barrier to ensure that the bamboo roots don’t sneak out…

bamboo planting 5


Yes, there were nuts and bolts and power tools involved…

bamboo planting 6


And now the Hale is happily in its new home below the retaining wall, where it should be safe from strong winter winds…

bamboo planting 7


Luckily, I got it in the ground right before the temperatures dropped below freezing this weekend. Nothing like the last minute. Now I’d better get outside and move the remaining 4 yards of dirt. Oy.

walkway this way?

October 27th, 2011

As we near an almost-but-not-quite foreseeable end to backyard projects, it’s time to turn some attention to the front of the house. It’s been an eyesore since we moved in.

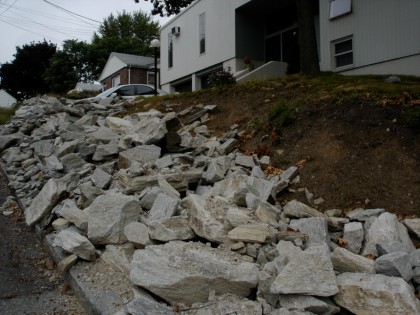
First, we had to move that massive pile of stone left by the previous owner…

rocky menace


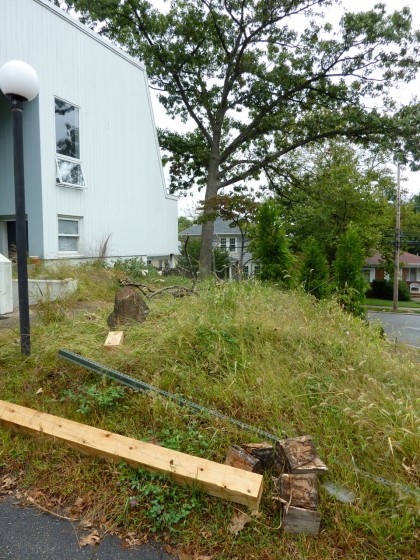
Then we had enough logs to build a second home…

logs out front


And always, weeds up to our armpits…

front, avec weeds


Basically, it’s looked like a disaster for three years now. The neighbors have been very polite about it. I finally weeded in preparation for this hillside’s big change and topped it off with a little soil. I’ll likely add more…

hillside finally weeded


We just started talking to our hardscape guy about possibly adding a few steps up the slope from the street before winter. It sucks having to shimmy alongside the cars in the driveway to get to the entry. Especially if you’re the postman.

Irving Haynes, the architect of chez ici, originally envisioned the house as having a walkway. You can see it in this rendering from 1971 (click to biggify)…

architectural rendering of our house, circa ’70 | Haynes and Associates


See? Steps coming down the hill in a straight shot to the steps at the front door. There must have been budget issues and that idea got nixed. Bummer. We won’t be pouring any more concrete, so that design is out. Will keep you up to date as we discuss ideas.

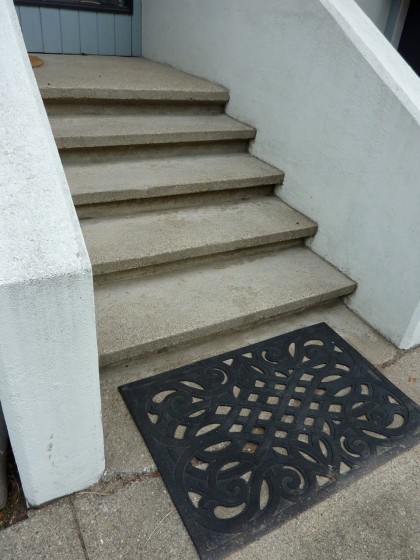
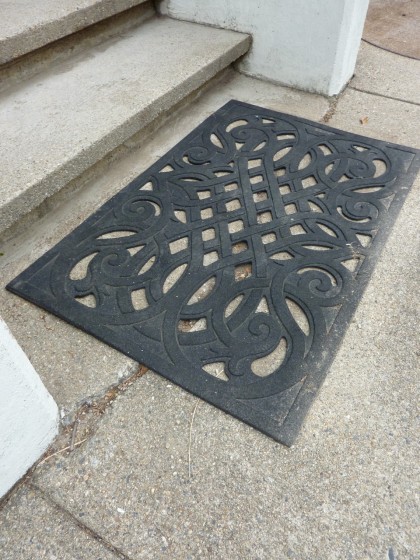
In any case, these are the steps leading up to our front door…

front steps 1


About that black mat…

front steps 2


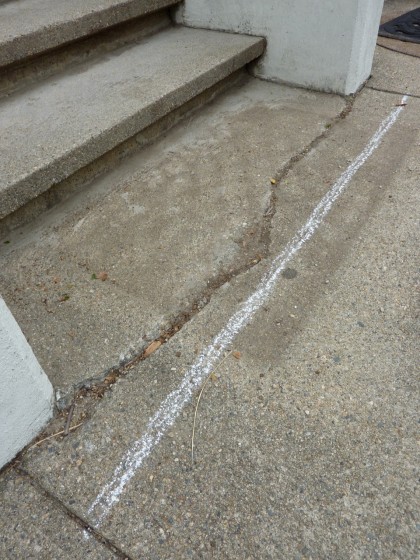
It was left in that very spot by the last owner. We kept it there to cover the crack, which ruins the otherwise intact concrete. I don’t want to rip out the original concrete if we can avoid it. So I was just thinking…

front steps 3


What if there was a way to remove only the bit of concrete from the chalkline to just in front of the lower step?

We couldn’t match the vintage concrete, obviously. But we could replace it with something else. Like a permanent sort of welcome mat. Just thinking out loud here but it could be made of:

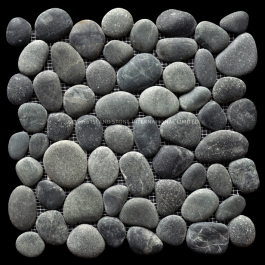
Mexican beach stone, like the border around our house. Could lay flat

island stone, perfect pebble in medan charcoal | islandstone.com


Or could be placed on end  (stacked)..

ann sacks pebble tile, bali in black and gray | annsacks.com


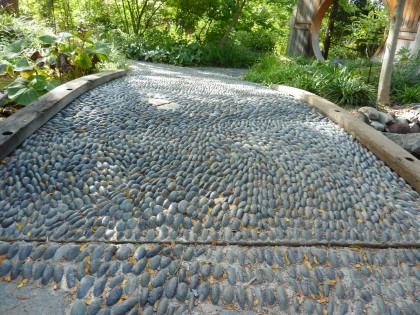
Reminds me of that gorgeous, handcrafted pebble walkway at Denver Botanic…

pebble walkway in the asian garden | shot at denver botanic garden


We could do it ourselves or buy pre-made tiles. Would carry a material we’re already using around to the front for a small detail area. I like that.

But I’m open to other possibilities…

  • A rectangle of colored concrete (small enough that we could mix it ourselves).
  • Tile or paint a “welcome” message on the concrete… like, um, HOME or YOU ARE HERE or BE NICE or some such message. Could also possibly inlay with off-ends from the granite we’re using on the patios and steps.
  • Tile, paint or inlay our house number in the concrete patch.
  • Press cast aluminum numbers (or even letters) in a modern font into the concrete patch.
  • Re-create one of Irving B. Haynes’ blocky or triangular artworks in tile. A little tribute to the architect right at our doorstep.


What would you do?

new vacation home!

October 24th, 2011

The first-grader announced that whoever wins a game of…

crazy eights card game


… will win this fabulous vacation home he has recently constructed in California…

vacay home 1


It has a modernist sensibility, dontcha think?

vacay home 2


View of the back. (The 7-year-old architect informs me that the green and red blocks just inside the back door are the stove)…

vacay home 3


How about that sweet upper deck?

vacay home upper deck


I am so gonna win this game! Afterwards, you’ll find me on the lounger…

vacay home lounger


In my Luke Skywalker clothes and random blue helmet. The furrowed brow? I must be waiting for my icy cold margarita.


what’s underfoot

October 20th, 2011

After a week of posts from Mr. Bettridge on the downstairs progress, we might just be caught up! Take it away, David…

—————————————————————————————————-

To make the downstairs more comfortable (and cheaper to heat) in the winter, we decided to insulate the floor slab. Our house scientist wanted 2” of foam, but we didn’t think we could afford to give up that much headroom, so we decided to use 1” instead.

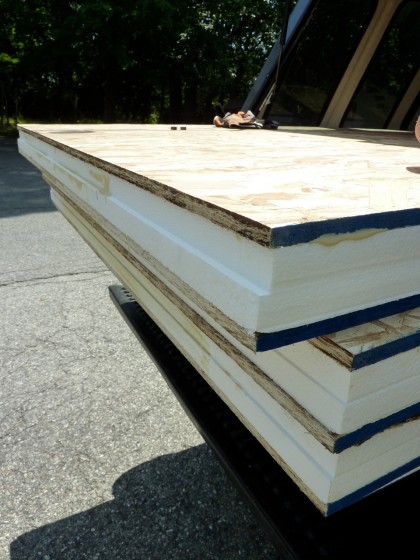
Then we became concerned that the foam alone might not be enough — its 20 psi load rating isn’t high enough to properly support furniture and whatnot. So we had local Branch River Plastics make us a bunch of these panels…

floor insulation panels


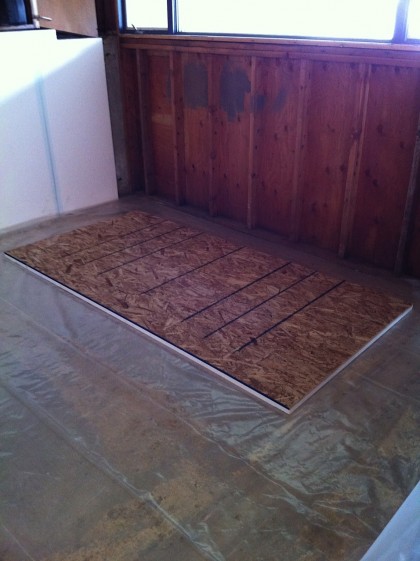
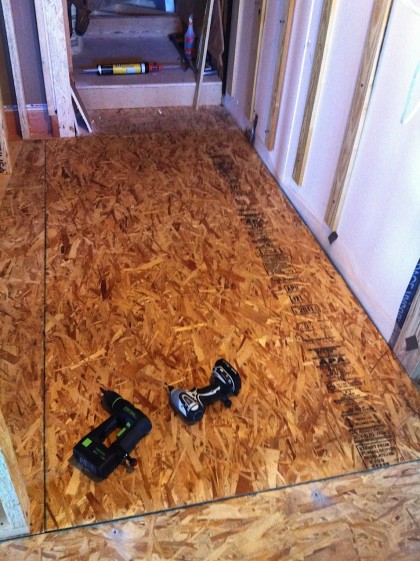
It’s the same EPS (styrofoam) we used at 3” thick to insulate the foundation walls, only these are made of 1/2” thick 4’ x 8’ OSB (oriented strand board) glued to 1” EPS….

floor insulation


The non-formaldehyde, non-outgassing OSB spreads out the weight of people and stuff on top of it and provides a nice stable surface for the finish floor to rest on…

floor insulation detail


Underneath the foam is 6 mil plastic that acts as a vapor barrier, keeping moisture out of the floor system. Even in its not-quite-completed state, the basement is down to 45% humidity which is great.

Eventually — well, soon — the cork floor planks will be installed over the top of the insulation panels. Until then, they wait…

cork tiles waiting in the driveway


Luckily, they’re no longer waiting in the driveway.

The last piece of sub-floor went in twice because of the leak in the foundation wall. On the right you can see the 6 mil vapor barrier coming out from under the sub-floor and up the wall. It got sealed to the 3” foam with non-hardening sealant (in that big caulking gun on the step)…

underflooring in front of steps


Give me a few more days and I’ll show you how we’re prepping the bathroom floor in a slightly different way.

getting into hot water

October 19th, 2011

Nope, no problems here. This is all about our new, high-tech, energy-saving hybrid water heater. Talk it up, David!

———————————————————————————————-

Some months back I told you about our house scientist and how we consulted with him on creating a greener, more energy-efficient home with this remodel. His recommendations resulted better insulation. But we’re also upgrading all of our equipment — starting with the water heater.

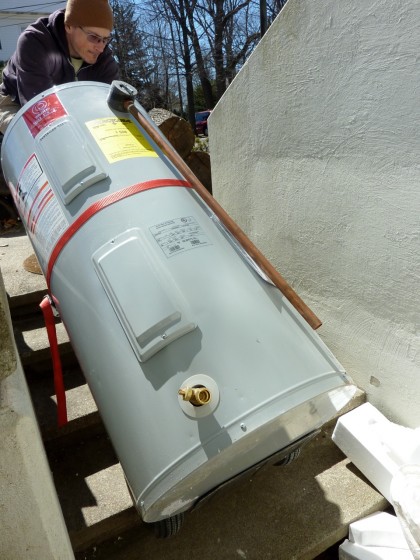
That meant out with the old and inefficient…

the old, inefficient water heater goes bye bye


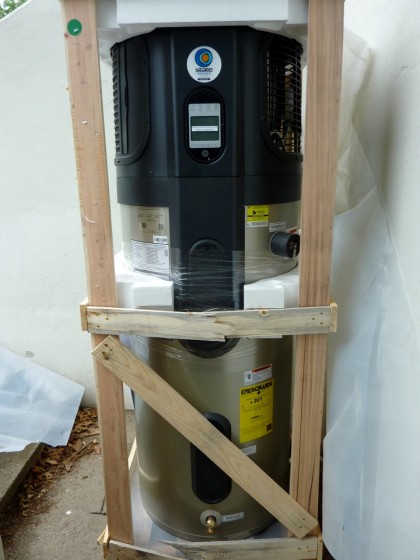
And in with the new space-age unit we like to call HAL…

the new hybrid water heater arrives


Even in its crate, you can tell this Energy-Star rated, State Industries Premier Hybrid Electric water heater is the future. It can use as little as 30% of the electricity of a regular unit…

the hybrid water heater in crate


You can think of it as a traditional electric water heater with the addition of a heat pump on top. Or you can think of it as an electronic wizard of hot water, with multiple modes of operation…

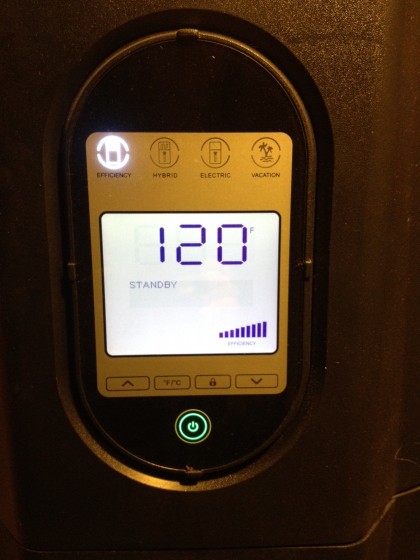
electronic display on the hybrid water heater


Energy-saver mode: runs the heat pump to pull heat (and, bonus: moisture) out of the air and put it into the water inside the tank. Hybrid mode: uses the heat pump and the smaller upper electric coil to heat the water, still saving some electricity but giving a faster recovery time — handy if everyone needs hot water at once for some reason. All-coil mode: shuts out the heat pump and just uses the two heat coils like a traditional water heater. I guess it would come in handy if we had a house full of guests for a week. Vacation mode: go to the beach without running full-bore.

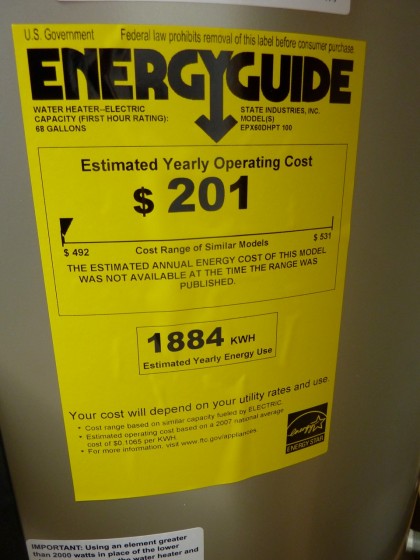
It has a 60 gallon tank — 10 gallons larger than we’d need with a traditional electric heater. Why? Because in energy-saver mode the recovery time (the time it needs to reheat the water in the tank) is slower.

hybrid water heater energy guide sticker


Hard to say at this point how much (if any) electricity we’re saving with the new water heater. However, I have noticed that it only runs once or twice per day for about an hour at a time. Its secondary function as a dehumidifier is working great though — it pulls the humidity down 2-3 percentage points every time it runs! That’ll be great when July rolls around.

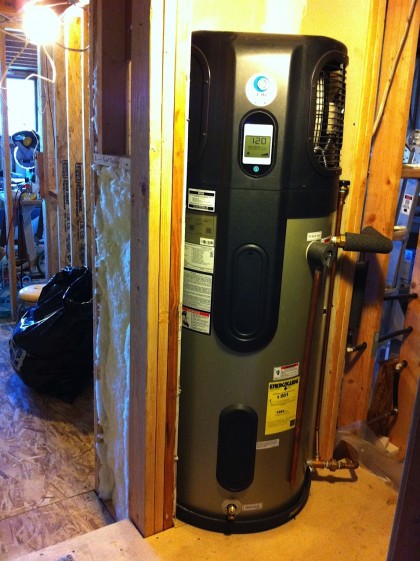
It needs 750 cubic feet of 50+ deg F air to draw heat from, but the pantry/utility closet we have it in is much smaller than that…

water heater in place


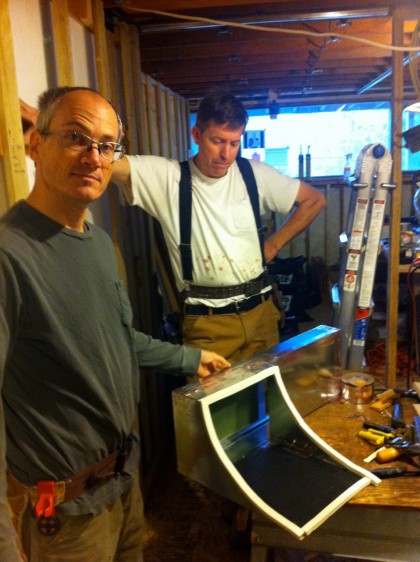
Don’t worry, we figured that out. See that opening inside the wall on the left there? That’s for a duct that will allow the heat pump to draw in warm air  from the larger main space. In fact, Joe just hand-crafted said duct from sheet-metal, mass loaded soundproofing vinyl and foam. And yes, pixie dust…

joe and his duct


That man is awesome. And now we pop it into place. Like buttah…

duct slides into place


The intake grille will be up at the top, offset from the unit’s intake. The foam and vinyl were added to cut the amount of noise getting out (the unit is noisy as the heat pump is basically an air conditioner).
Want more info on this hybrid water heater? You’ll find it here.


running the plumbing

October 18th, 2011

David will now show you how we’re getting closer to having a bathroom downstairs…

—————————————————————————————————

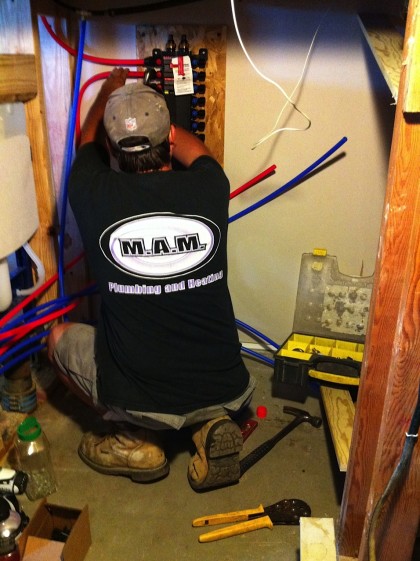
Things are really moving along down here. Once the bathroom framing was done, the plumber came in and ran all-new plastic pipe…

plumbing2

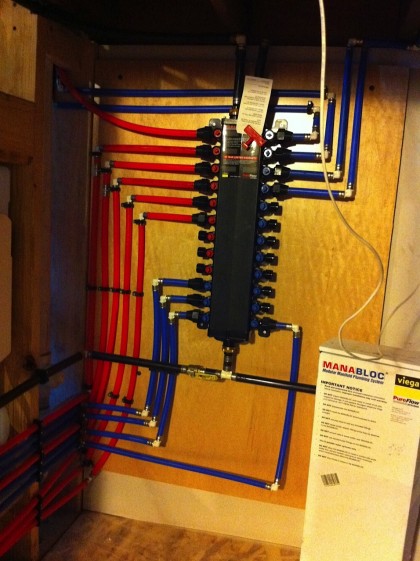
Rather than the traditional branch-style method of piping, with one shut-off for the whole house and individual shut-offs near some fixtures (but not usually all fixtures), we opted to have a manifold (think breaker panel for water) with all the piping in a home-run configuration. This means every fixture has its very own feed direct from the manifold and its very own shut-off…

plumbing4

Each of those little red and blue circles down the sides of the manifold is a shut-off. Eventually they’ll get labels so we know which is which.

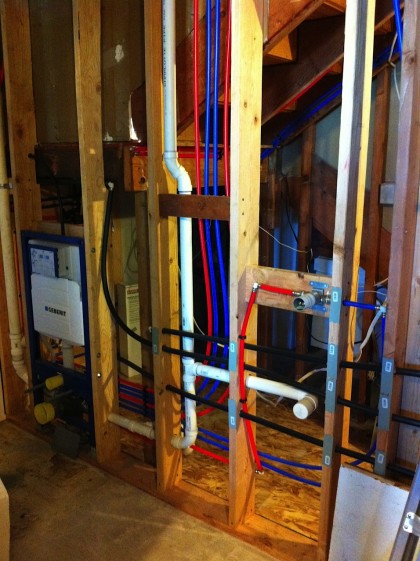
There was just a sliver of space between our old, floor-mount toilet and the shower, so we’re going with wall-hung to gain some space back. That’s the precursor to our new Duravit wall-hung toilet on the left — its slim Gerberit tank (jah, German) hides away inside the wall framing…

plumbing5

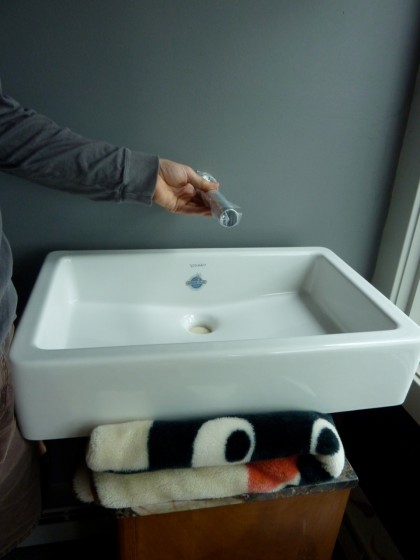
The sink faucet rough-in with drain below is on the right.

For the faucet above the sink, we also chose wall-mounted. You can’t resist playing with it when you open the box, it’s so cool….

playing with the sink and faucet


Modern. Simple. Not a bunch of fuss.

Then there’s the shower. Remember what it used to look like? Now we’re going for a much more minimal look. No more tub and the shower will have a partial glass wall with an open doorway for stepping in.

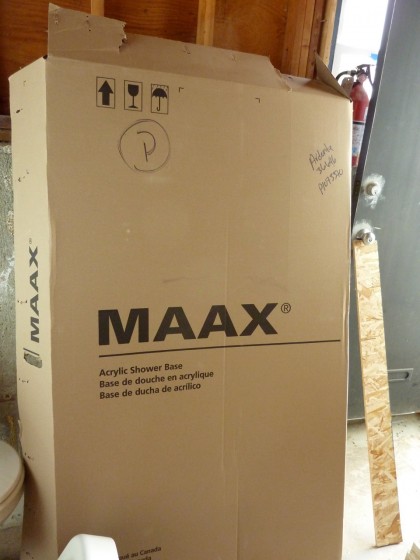
Brook wants a teak grid in the shower, so we went with this for the floor below it…

shower pan by Maax


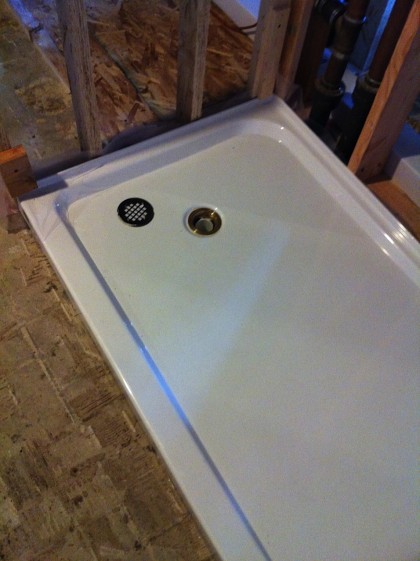
The shower pan will save us big over having to create a tile shower floor. Comes already sloped for drainage…

plumbing3


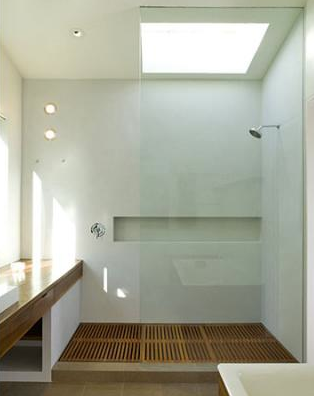
The plan is that the removable teak grid will sit inside the pan and look somewhat like this…

shower with teak floor, cary bernstein architect | houzz.com

shower with teak floor, cary bernstein architect | houzz.com


In fact, that’s pretty much the same idea we’re using for the glass wall, too. Should look very swank when it’s all said and done. Speaking of which, I should probably get it said and done right now!


giganteus! oh my

October 17th, 2011

I’ve been known to stalk plants. This year, Miscanthus ‘Giganteus’ (Giant Chinese Silver Grass) has been my prey. I came across it last summer when I was stuffing my yard with other grasses — unfortunately, I only came across it online…

miscanthus giganteus photo by marcia sofonoff  bluestem.ca

miscanthus giganteus photo by marcia sofonoff bluestem.ca


Wowza. Giganteus! More info here. You may have come across it while ogling Margaret Roach’s garden via A Way to Garden

miscanthus-giganteus-fall via awaytogarden.com

miscanthus-giganteus-fall via awaytogarden.com (best garden blog ever)


Gorgeous. But try to find it at a nursery. Impossible! Actually, that’s not exactly true. In July, I finally stumbled across it at Farmer’s Daughter in South Kingstown, RI, far toward the back in their display garden…

miscanthus giganteus at farmers daughter


To look at, not to buy. But get a load of that stature! And I’m very impressed at how it stands up to the wind…

miscanthus giganteus vs. the wind


So after a little more research I found that you can easily pick it up on eBay (in season). That’s where I got mine this summer — cheapcheapcheap. Little known fact: apparently it’s been grown in Europe as a source of biofuel since the ’80s and it’s finally making its way stateside for the same purpose.

I really wanted to see this monster at work in a real-life garden — in person and not just online. So when I saw that Duncan Brine was opening his Hudson Valley garden to the public for the Garden Conservancy’s Open Days schedule, I was psyched. We were sooooort of headed in that direction anyway last weekend for a visit to NYC. It was worth a jog to the north to see what he’s done with six acres.

This stand of giganteus greets you on the way in (click to biggify)…

brine garden giganteus hedge


So what secrets lie on the other side of that 12′ hedge?

brine garden giganteus on the other side


Twisting gravel paths and naturalistic plantings. I love the way the giant miscanthus contains this garden.

And how about a zinc bench ringed by giganteus? Cozy…

brine garden bench in giganteus


I can so make this work, even in our urban garden. My eBay plants are still mere spindly stalks at around 6′ or 7′. They’re eager to get into the ground before winter…

my giganteus


Can’t say as I blame them. Maybe this week?

Thanks to the Brine Garden and its lovely host, Duncan, for encouraging my obsession. And for not making fun of me for my stalkerish tendencies.

two weeks later

October 14th, 2011

Misty, foggy days are ideal for baby grass…

grass at two weeks, closeup


Starting to look like a lawn! Click to biggify…

grass starting to look like a lawn