the long sleep

January 18th, 2011

How do gardeners make it through New England winters?

snowfall

By dreaming of spring, of course. I’m up to my arse in seed and plant catalogs…

spring seed catalogs

spring plant catalogs

And that’s not even all of them. I’ll have to get back to you about what looks interesting. Of note so far: pink blueberries. It’s a crazy world.

the upstairs plan

January 18th, 2011

On Friday I showed you the downstairs plan we worked out with Emily, our architect. Speaking of which, we met with her and the engineer today to make sure everything’s hunky-dory before we go to the city for the permit. Getting closer. While we wait for final engineering drawings, let’s discuss the rough upstairs plan that Emily drew up. K?

Stage Two: Main Living/Kitchen Area

The upstairs remodel will have to wait for warmer weather — which is fine since we’ll be plenty busy with the downstairs. Upstairs is more involved than the downstairs as this is where the main living area and kitchen are located. Feel free to take the visual tour of what we want to do (I posted that back when we thought upstairs was going to be Stage One).

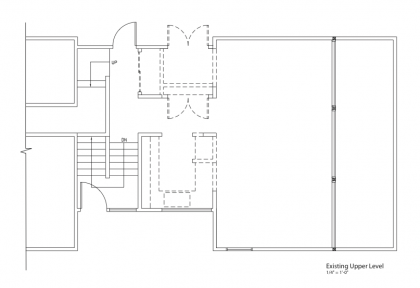
The upstairs currently looks like this (click to biggify)…

existing upper level

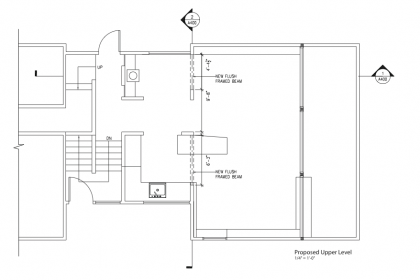
With the changes we want to make, it will look more like this…

proposed upper level

Not easy to spot the differences but here they are:

Just like downstairs, we’re knocking out a few load-bearing walls and putting in beams in order to open up the space. We’ll gain some breathing space in the kitchen by putting in a cooking island/breakfast bar that juts into the living area, plus we’ll go vertical with storage and add a large cooling tower/skylight over the whole space. Facing out to the backyard, we’re knocking out the giant closet and putting in glass sliders and little sitting area with a fireplace insert. The main living area will be flanked by floor-to-ceiling built-ins with built-in seating. The dining area next to the tiny kitchen will get a built-in sideboard/serving shelf as part of its floor-to-ceiling built-ins. We’ll replace current sliders and windows, put in a new floor and ceiling, and improve lighting and heating.

Basically, nothing goes untouched. So do you think we can get it all done in 2011? Let the wagering begin.

you game? Space 1999

January 14th, 2011

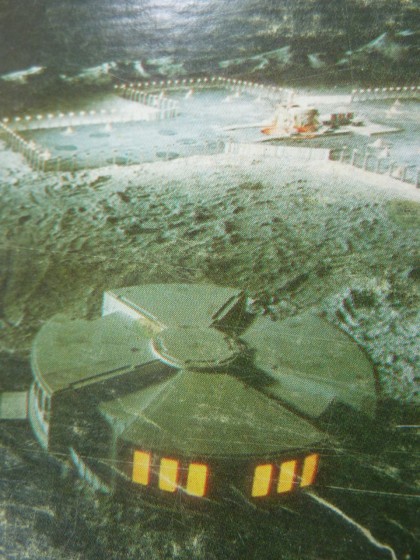
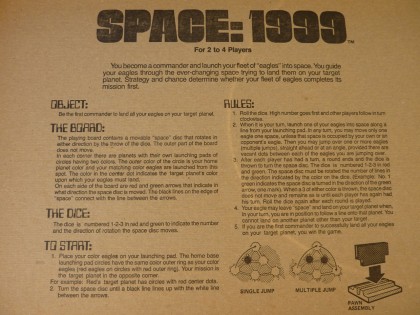
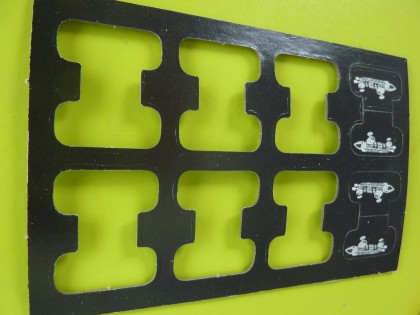
It’s Friday! Last week that meant The Six Million Dollar Man. Digging further back into my closet of obsessive collecting of 1970s TV show board games, this week I offer you Space 1999. Why? Because I can.

1999_1

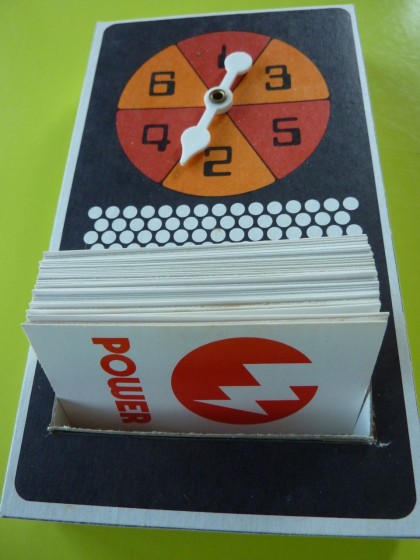
Object: Be the first commander to land all your eagles on your target planet.

1999_5

1999_6

1999_7

1999_8

1999_2

1999_3

1999_4

1999_12

1999_13

1999_14

1999_15

1999_16

the downstairs plan

January 14th, 2011

I go on and on about how this remodel is really going to happen and yet it looks like nothing actually does. But behind the scenes, things are happening. Our supastar architect, Emily Wetherbee, has met with us several times to get the Stage One plans finalized. Shall we take a look?

Stage One: Downstairs Entertainment/Guest Area

We always thought the upstairs would be Stage One. But because we’re planning structural changes, we want to begin at the bottom and work our way up. Plus timing is everything, right? It’s winter and the work we want to do upstairs in the main living area and kitchen involves skylights and tearing out walls. Who wants a blizzard in their livingroom? Not us. It just makes more sense to begin downstairs — it’s all interior work down there.

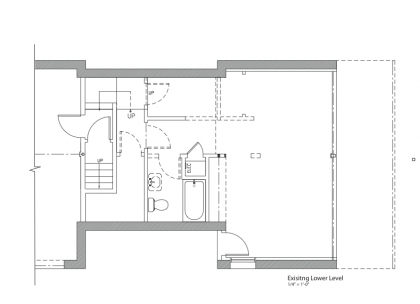
The downstairs currently looks like this (click to biggify)…

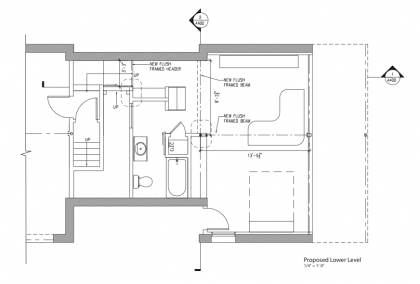
With the changes we’re about to undertake, it will look more like this…

10910_proposedlowerlevel

So what are the differences — other than furniture being drawn in?

Essentially we’re knocking out some space-interrupting, load-bearing walls and replacing them with two headers that will make the downstairs less chopped up. We’ll move the water heaters out to gain a new access corridor and built-ins, tear out the tiny efficiency kitchen we’re currently relying on and replace it with an office area, gain a few feet of bathroom space, add storage space plus a cushy Murphy bed for guest visits. Oh, and a wet bar, since we already have the plumbing. There will be lots of other details, like new windows, new floor and ceiling, eliminating window and door trim, new lighting, etc. etc.

Because we’re dealing with load-bearing walls, Emily also had to take into account future plans for the upstairs. Interrelated pieces that have to go to both the engineer and the city in order to get a building permit. I’ll show you on Monday. Thanks, Emily, for starting off our New Year right!

the blizz

January 12th, 2011

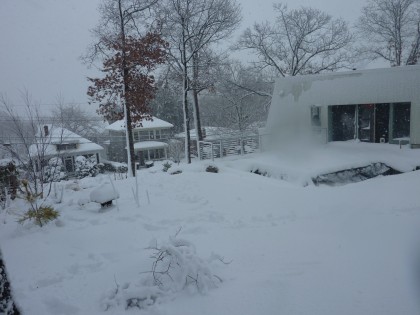
Still digging out from the blizzard that blew in while were were sleeping…

early morning blizzard

icy railing

Snowflakes on the lens. My big fat glove in the photo. Nice.

My first order of business this morning was going out to knock the snow off my heavily coated trees. It doesn’t look like much in the photos but some of the branches on my conifers and Japanese maples were in danger of snapping off…

snow1

snow2

snow 3

snow on the river birch

My 2 1/2′ bamboo is up to its ears in snowdrift…

buried bamboo

The stone lantern looks very snowcapped Mt. Fuji…

snow-capped lantern

And the icy butterfly chairs remind me that spring is far, far away…

snow-covered butterfly chairs

67 days and counting.

how to be a cold-brew convert

January 11th, 2011

Who’s up for off-topic? You, I hope. My Facebook friends know me for nonstop yammering and an addiction to coffee. For some reason, my posts concerning cold-brew coffee have generated a surprising number of comments, so I thought I’d bring up the subject here.

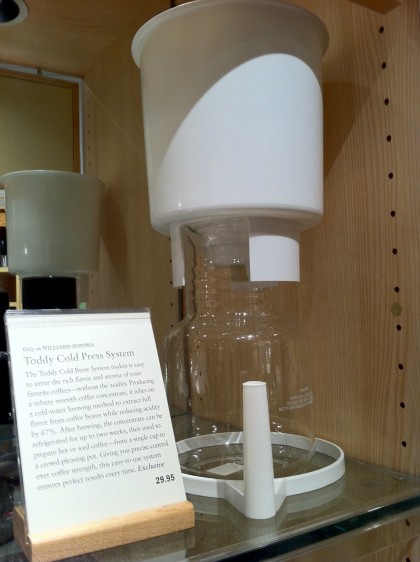
On my recent holiday trek to the local mall of shame, I stopped by Williams-Sonoma and spied something new…

toddy cold press spotted at williams-sonoma

That’s the Toddy Cold Brew System we’ve been using for a few years now. Back in ’07, I had to hunt ours down online.

It was a New York Times article that hipped me to the bitter-free joys of cold-brew and the Toddy, although you can use a plain ol’ jar if you want. Apparently the cold-brew method results in a coffee with 67% less acid than the standard hot-brew method — you actually can taste the difference. And you don’t have to plug anything in!

Official instructions are here but I’m going to show you how easy it is to use a Toddy.

THE TODDY SETUP

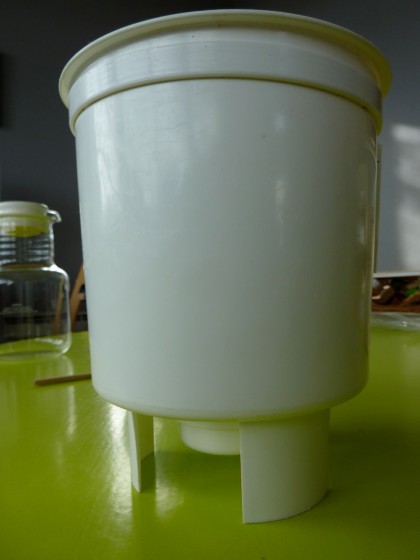
A plastic brewing container…

toddy plastic brewing container

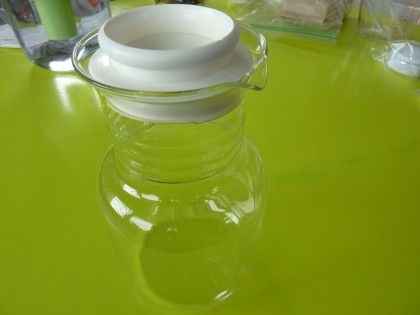
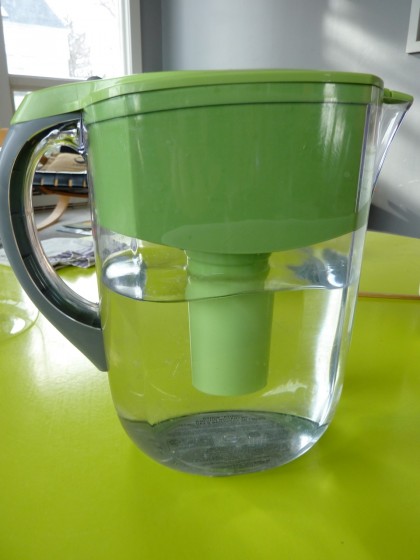
A glass pitcher with a rubber lid…

glass pitcher/decanter

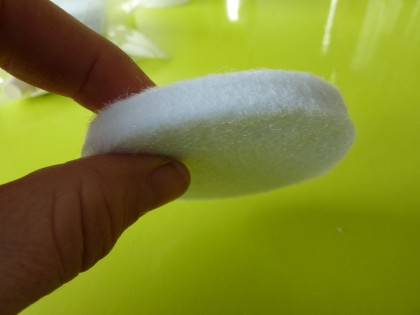
Two reusable filters (you only need one to brew, the other is a bonus)…

toddy filter

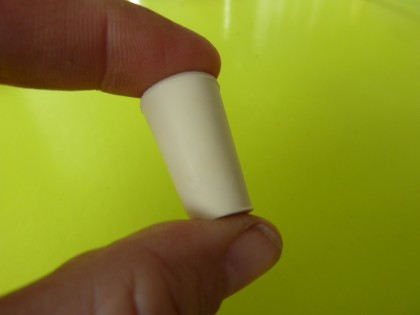
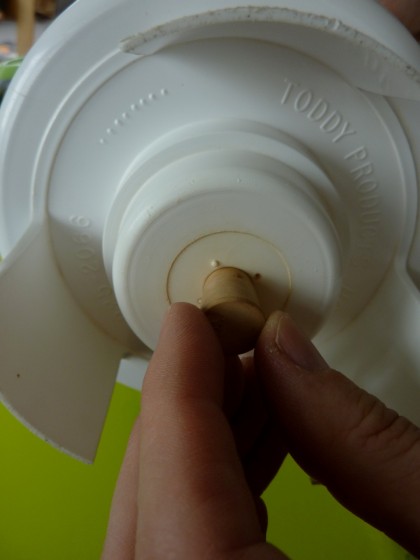
And a rubber stopper…

rubber plug

WHAT YOU BRING TO THE PARTY

A pound of your favorite coarse-ground coffee (the coarser the grind the better, in my opinion)…

a pound of coffee

A big pitcher of water…

a pitcher of water

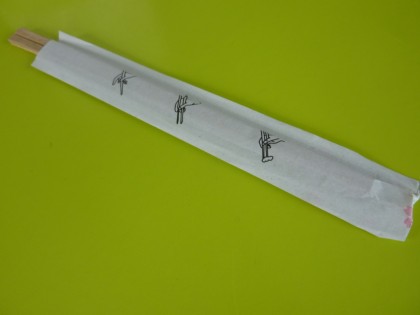
And a chopstick…

a chopstick

David, my kickass brewer, says it helps. Explanation coming up.

NOW THE EASY-PEASY INSTRUCTIONS

See the hole in the bottom of the brewing container?

hole in bottom of brewer

Plug it…

plug the container

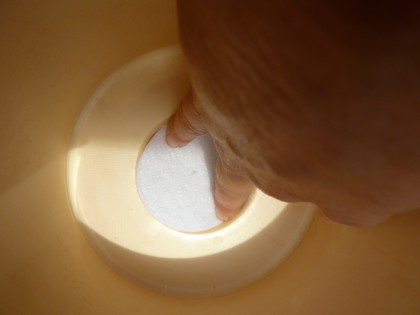
Press the filter into the bottom of the inside of the container…

add the filter

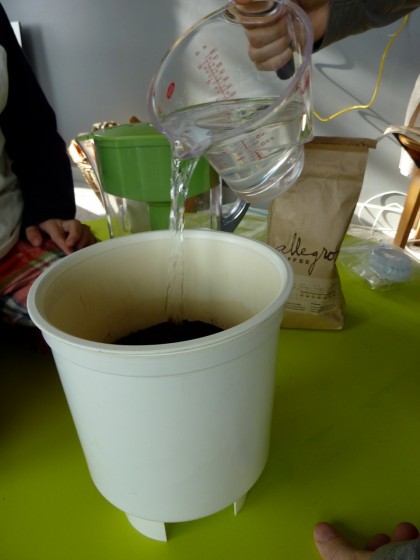
Pour in 2 C of water…

pour 2C of water

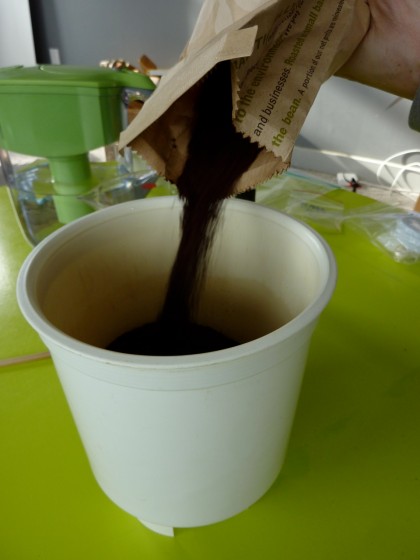
Then add 1/2 the bag of coffee and don’t stir the grounds…

pour half the bag of coffee

Pour in 5 C of water on top of that and then wait 5 mins while the grounds begin to soak it up…

pour 5C of water

Add the remaining 1/2 bag of coffee and again, don’t stir the grounds…

add the rest of the coffee

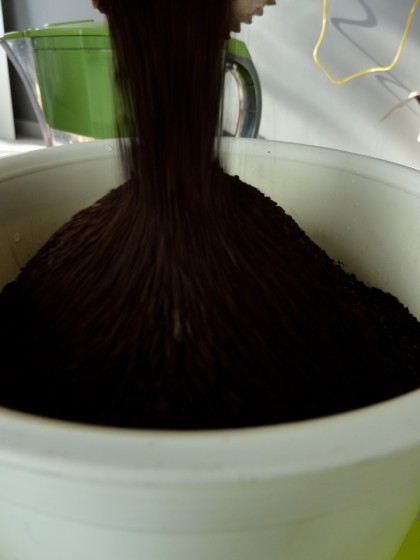
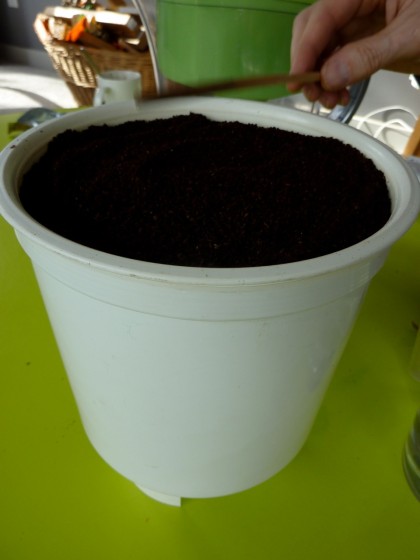
As you can see, the coffee will mound up — you’ll need to level it out. This is where the chopstick comes in handy…

flatten the mounded coffee

Top it off with 2 C of water…

add 2C of water

Then leave it for at least 12 hours. The longer you ignore it, the stronger the brew. It’s a good idea to check the topmost coffee grounds an hour or two later — if they’re not wet, press them down with the chopstick.

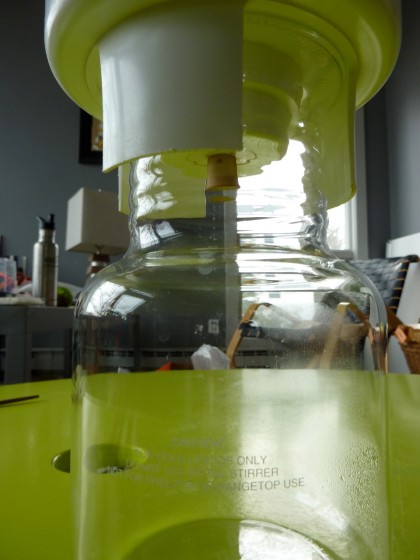
When time’s up, position the container over the pitcher…

set container on pitcher

Quickly pull the plug and set the coffee freeeeeeeeeeeee!

pull the plug and release the coffee

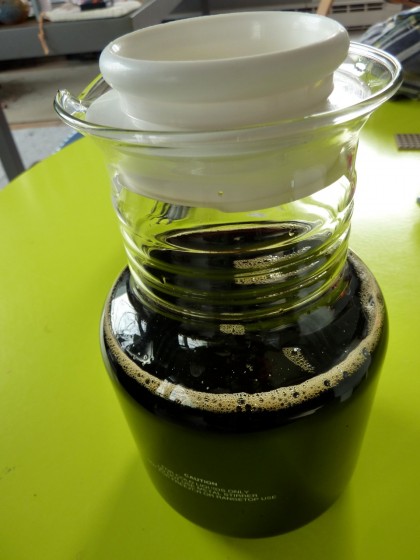
When the container is fully drained, your caffeinated bliss is ready to enjoy.

pitcher of coffee to last you DAYS!

Stash it in the fridge and, depending on how much coffee you drink, you’re set for days and days and days. A pitcher typically lasts me for a full week of daily coffees.

This is concentrated coffee, so you’ll have to play with how much water (if any) is the right amount to add to a cup of concentrate. By the time I add ice and soy milk, I only need to cut mine a tiny bit with water. If I add a ton of ice on a hot day, I don’t even bother to add water cuz the ice melts fast.

back to the bunk

January 10th, 2011

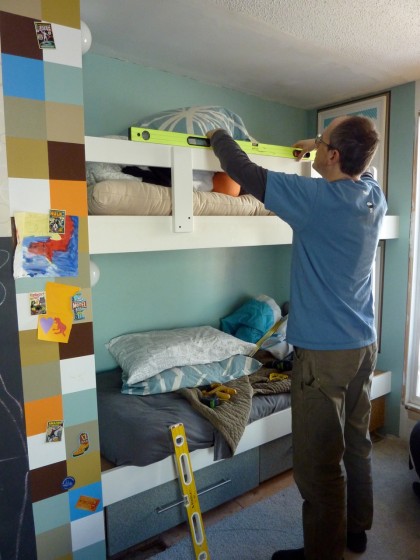
OMG, completion of bunk bed is finally underway!

bunk bed in progress

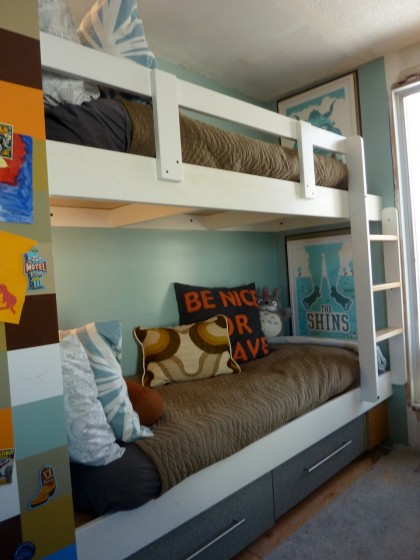
It only took 10 months to get back to it but now it’s actually happening! I guess last year’s February post turned out to be a cliffhanger. But lookie…

bunk bed with ladder and rail

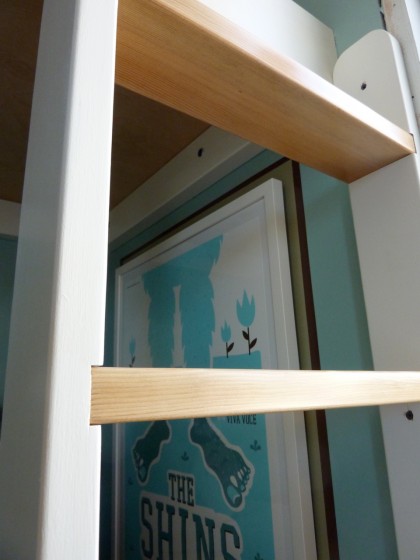
bunk bed ladder detail

I like how the wood treads echo the wood on the bunk above. Good work, David!

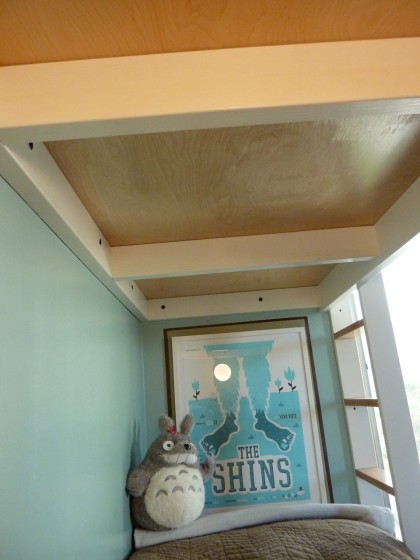
bunk bed view

(Shoulda straightened that poster before I took the picture, eh? Oh well.)

Maybe in another 10 months we’ll get around to finishing the ceiling, floor and trim. *sigh*

you game? The $6M Man

January 7th, 2011

In my very first post last February, I showed how our entire household is a maze of boxes and piles awaiting an actual remodel. There are things in those boxes I haven’t seen in three years, including my inexplicable collection of ’70s TV show boardgames — still haven’t decided if I’m keeping those, although I guess they make sense in a ’70s house.

This week I pulled them out to appreciate their cheesey goodness and will now share one with you every Friday until I run out. Ready? Let’s start with The Six Million Dollar Man…

6mil1

Object: Each player controls a bionic man — but only one is the real Six Million Dollar Man. The first player to complete his four assignments wins the game, proving he’s the Six Million Dollar Man.

6mil2

6mil3

6mil4

6mil5

6mil6

6mil

6mil7

6mil8

6mil9

6mil10

6mil11

6mil12

6mil13

6mil14

6mil15

6mil16

6mil17

6 mil 1975

Hot. I say that man is undervalued.

blower door whuh?

January 5th, 2011

What’s a really awesome thing to do on New Years Eve? Have a blower door test done, of course. A who, you say? And “Blower? I hardly know ’er!”

So a blower door test is basically an innuendo-loaded way to find out how airtight your home is. It’s the only way to measure air infiltration into your house. You get a certified, professional energy auditor to conduct one. For a minimal investment, you could potentially save thousands in energy costs. I’ll let David tell you more…

*          *          *          *          *

An energy audit is a survey of existing conditions in the home — a walk-around to locate and identify specific problem areas and a plan of action that takes into account the homeowner’s budget and energy savings goal. Some elements of the plan of action will be based on past experience and not on actual quantified testing. For example, big air leaks are easy to locate, but air can take a circuitous route which makes blocking leaks difficult. Lots of small leaks can add up quickly and small leaks are VERY hard to locate and rectify.

That’s where the blower door test comes in. It makes small leaks big and big leaks huge, thereby making them much easier to locate and fix. The extent of the renovations we plan for our house include all the things that a regular energy survey would recommend: energy-efficient doors and windows, additional insulation, etc,. so an audit would be a waste of time and money for us at this stage. Instead, we wanted to quantify how well our house performs before, during and after all our renovations. To help us, we turned to Matt Banoub, owner of Aten Energy Conservation.

Matt showed up last week and lugged his big red blower door test apparatus up the stairs…
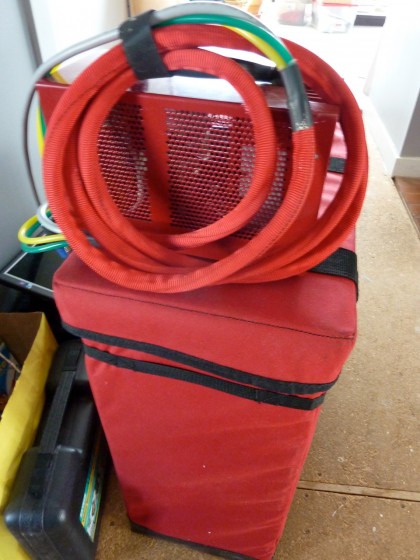
blower setup

Before he started, I double checked all the doors and windows around the house to make sure everything was closed up tight. (Why wouldn’t it be? It was 20° outside!) Matt set up in our open back doorway…
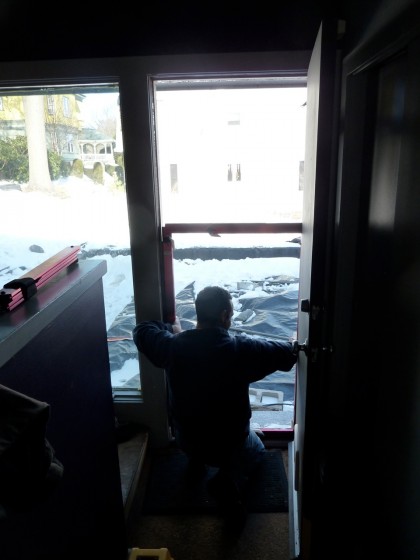
getting the door prepped

After sizing the setup, he made a few tweaks to make sure everything would fit…
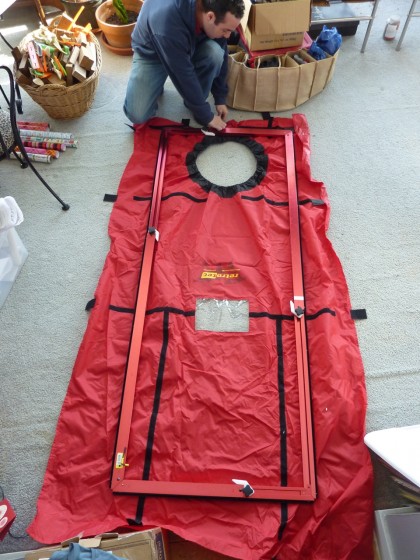
blower door cover

The result was a nice, tight seal on the door frame…
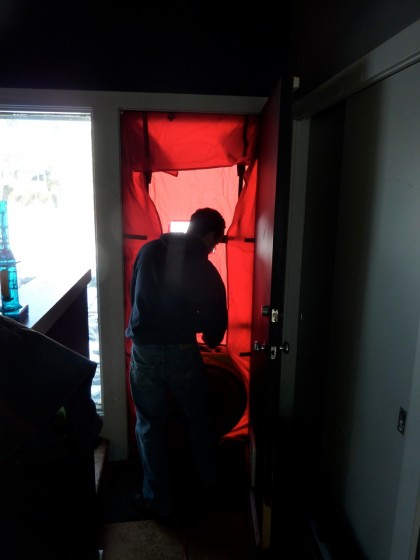
blower getting fitted into doorway

Then he inserted a very special fan into position…
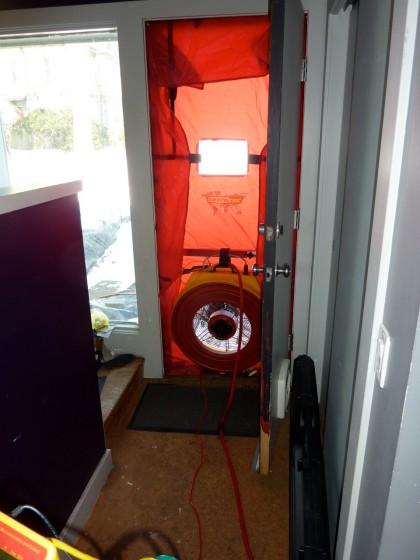
blower test fan in place

The fan controller takes air pressure readings from three sensors, comparing the one outside the house to the one inside the house, and uses a sensor inside the fan itself to measure the volume of air passing through the blower door…
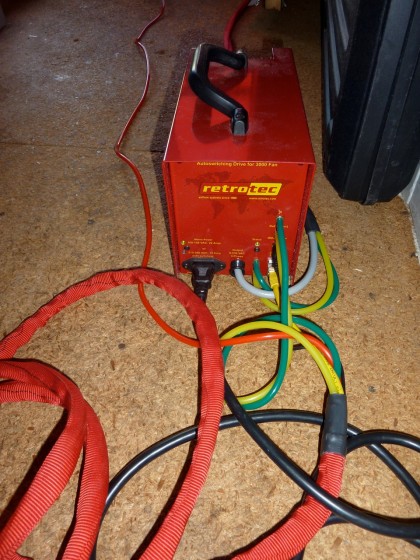
blower drive for the fan

It also controls fan speed in order to achieve the desired pressure differential between the inside and the outside…
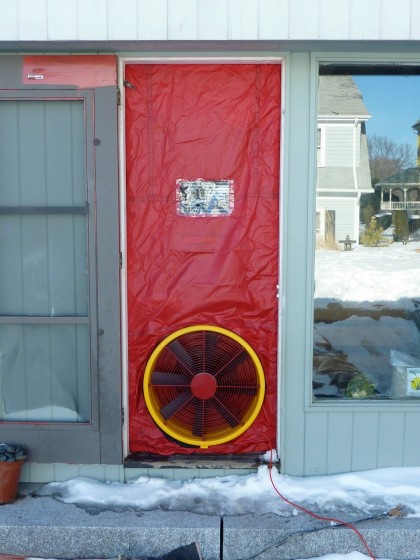
blower from the outside

Once the sensors had stabilized, Matt started up the fan which sucked air out of the house until the pressure inside was 50 pascals lower then the pressure outside the house…
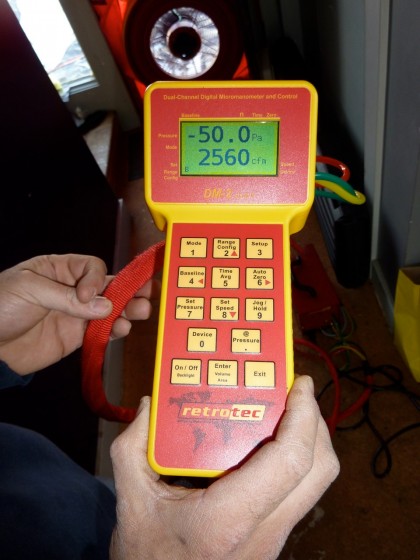
blower readings

The pressure differential meant air was now trying very hard to get into the house any way it could. At that point he measured how much air was blowing out. As you can see, we were blowing 2,560 cubic feet per minute (CFM) out the door at 50 pascals. That number doesn’t mean anything until you take into account the volume of the house. I figure our house has a volume of 15,320 cubic feet. That means at 2,560 CFM/50 we have 10 air changes every hour (expressed as 10 ACH/50). That puts us between moderate and leaky which isn’t bad in a country of mostly poorly performing homes.

Matt says we can seal all the way down to 1,814 CFM/50, which would be 7 ACH/50. That sounds like a lot but remember that’s with the house pressurized. Actual air changes per hour right now are probably about 1 — we’d like to get that down to . 35. Air change is important in a house for the health and safety of the occupants. As you know, we breathe in oxygen and breathe out carbon dioxide, plus any appliances (stove, water heater, furnace, wood stove, etc.) that burn fuel (gas, oil, wood) are also using up oxygen and emitting carbon dioxide. That makes it essential to replace used up oxygen and vent carbon dioxide. Luckily, our house has all electric appliances, including baseboard heat and water heaters, so we don’t need to take them into account.

Excess moisture in the air can be another problem. It comes from our breath and sweat, cooking, bathing, clothes dryer, etc. If we were to get our house to the point where it has fewer than .25 ACH, we would need mechanical ventilation. If that becomes necessary, we’ll definitely get one with a heat exchanger that’s about 80% efficient at transferring energy from the hot air to the cold air in whichever direction makes sense (ie, in the summer we want it to keep heat out and in the winter keep heat in).

So what did we learn? That our 1970s house is pretty well sealed. We’ve arranged for Matt to come back to measure the difference our updates make as we remodel both the interior and envelope of the house.

Want to know more?

Ways to save on your energy costs:

  • In RI, National Grid offers free energy audits that can earn you sizable deals on everything you need to weather-proof your home.
  • Nationwide, take advantage of state incentives ( tax credits and rebates) on making energy improvements.
  • The federal government also offers money-saving programs for making your home more energy-efficient.

recently spotted

January 4th, 2011

I seldom go shopping these days, much preferring to order from the comfort of Chez Mess when possible. On Christmas Eve, however, I had to dash into the mall, that temple of mass consumption and hideous carpeting. Last-minute stocking stuffers, ya know.

Snagged some cute vintagey card games for the kid at Restoration Hardware…

classic card games | restorationhardware.com

classic card games | restorationhardware.com

And then I spotted something interesting over in the corner…

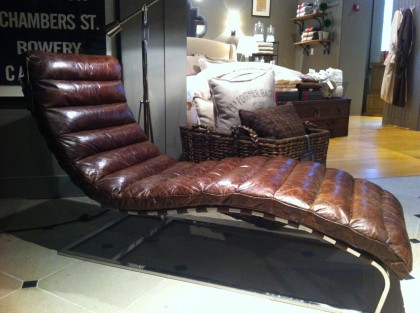
oviedo chaise lounge spotted at restoration hardware

lounge tag

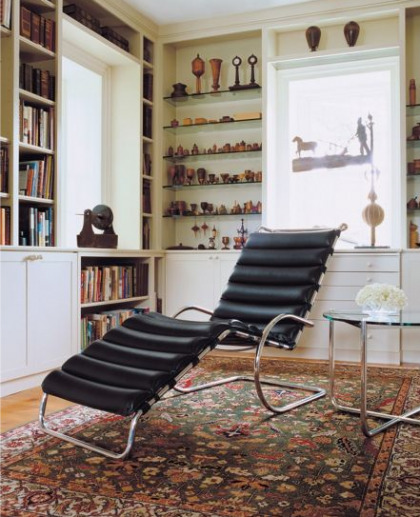
An obvious tribute to Knoll’s MR Chaise Lounge, designed by Mies van der Rohe in 1927…

mr chaise lounge by mies van der rohe for knoll | dwr.com

mr chaise lounge by mies van der rohe for knoll | dwr.com

Far from cheap but much more affordable than the original. Have you seen how much the Knoll goes for? A little history on the original, still in production, here.

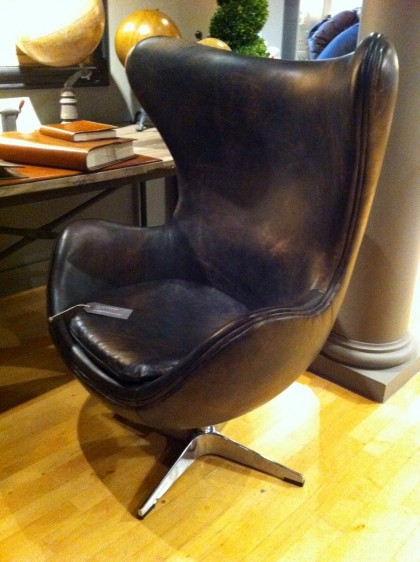
Then a few feet away from the chaise, I spotted this…

1950s copenhagen chair at restoration hardware

chair tag

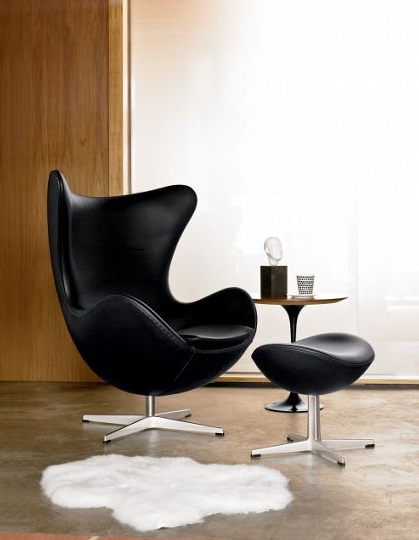
Basically a distressed leather homage to the iconic Egg Chair designed by Arne Jacobsen for Fritz Hansen…

egg chair by arne jacobsen for fritz hansen | dwr.com

egg chair by arne jacobsen for fritz hansen | dwr.com

Gorgeous since 1958 and still going strong. If you’ve ever longed for an Egg of your own, you’re probably well aware of what it costs brand-new. If you don’t require the original, I suppose Restoration’s version isn’t too shabby. The leather gives it a men’s club/smoking lounge kind of a look. Cuba meets Denmark?

Not the sort of thing I expect to see at Restoration Hardware, although they have added a little midcentury modern into their mostly traditional mix in the last few years. Their Modern Collection of bath hardware is about as minimal as they get. Anyway, just thought I’d share.
Still undecided about reproduction/reinterpretation vs original. I mean, I don’t like to think of myself as a total snob, insisting on an original no matter the price. Label hounds can be so irritating. On the other hand, is it asking too much for brands to come up with their own designs rather than profiting from someone else’s design? Granted, finding a way to make expensive things for less is the way of the world — it’s what makes sites like whiteonwhite so wildly popular. And I suppose Restoration Hardware’s whole schtick is “restoring” classic style to home goods. I dunno. What do you think?